My favorite food is pizza. I’ve been making my own for fifteen years. I’m always fiddling with my recipes, so there’s a certain amount of drift in the formulas I use to make food and drink. I look at my written recipes as nautical charts for reference. There are times when the sandbars and currents change. One must be prepared.
I still enjoy ordering pizza, and I am not above trying out local flavors. Like a Kung Fu master searching the land to perfect and complete his style quest, I examine what I encounter for tips and tricks to improve my methods. For now, the Pizza of Doom formula is as follows:
Dough (2-3 pies worth):
2 tablespoons active dry yeast
2 cups water
2 tablespoons olive oil
2 tablespoons sugar
2 tablespoons sesame seeds
2 tablespoons whole ground flax meal
Numerous cups flour
Sauce (2 pies worth):
28 ounces of blended tomatoes, any source
Half an onion, preference on sweeter or milder varieties
4 garlic cloves
2 tablespoons oregano (dried, but fresh is better)
2 tablespoons basil (dried, but fresh is better)
1-2 teaspoons crushed red pepper flakes (for kick)
20-30 grinds of pepper
Fixins (per pie):
Some extra olive oil
Mozzarella cheese, 5-8 flat slices or 12 ounces shredded
Provolone cheese, 5-8 flat slices or 12 ounces shredded
3 ounces pepperoni (or sliced onion, or mushrooms, etc.)
Music:
Anthemic eighties rock music with extensive vamping preferred
Leaving the flour out, I mix the dough ingredients together with a wooden spoon in a large antique glass bowl I have (any container of large size will do). I “proof the yeast” for 15 minutes, which means I leave the yeast alone to get psyched at all the tasty nutrients. You’ll see small light brownish areas begin to erupt in the mixture as the yeast proofs into overdrive.
You start adding flour and mixing it in with a wooden spoon. I add a mix of bread flour and regular flour, with a cup of whole-wheat flour for extra texture. The mixture will go from soupy to gummy as you add flour. Look for the transition point where the dough becomes thick and slightly sticky. You’ll switch to using your hands to knead the dough, adding small amounts of flour to keep the surface from getting too sticky.
Avoid over kneading. Massage the dough into a ball, cover the bowl, and let it rise. Once it’s risen to a good level (about 2 times in size), punch it down and massage it back into a ball. It won’t shrink to its original size, but that’s okay. Let it rise again (it should rise quickly now). Mix the sauce ingredients in a blender and set aside while you wait.
When the dough has risen enough you separate it into pieces depending on how many pizza pies you want to make. My pizza screen is 16 inches in diameter, and I find I get about 2-3 pies total. It depends on how much I let the dough rise. I usually make 1 pie, then make a second the next day. You can put extra dough in the fridge for later. On days when I need lots of pizza, I use the whole shebang.
Warm the oven up to 450-500 degrees depending on your oven’s strength (you will know how efficient it is). You don’t need a pizza screen — I’ve used lasagna dishes and cookie sheets. You’ll need a large, flat surface to put the finished product(s) on, preferably wooden so you can cut the pie into slices.
Sprinkle flour onto your rolling surface, and plop your piece of dough onto the surface. Massage the piece into a circular shape and gradually form it into a disc. Then gently, patiently use a wooden rolling pin to flatten the dough out. Flip it, sprinkle the exposed side with flour to keep it from sticking, and roll it flatter.
You’re looking for that magical state of thin without breaking when you pick it up to put on your screen. You might have to bunch it up and start over to get the right elasticity. If you want a thicker crust then you don’t need to go as thin, but be aware of how much the crust rises when it cooks. A huge crust will mean a drier crust down the line.
I lay mine over the screen, then use a rubber spatula to cut the edges evenly around the screen. I then half fold, half roll the edges of the pizza down and under the rest of the dough. This creates a raised “border” at the edges of the pizza to keep all the goodies from overflowing onto your oven.
Using your fingers, spread olive oil all over the top, including the edges. This will keep moisture in and help the crust rise properly. If you want a crunchier crust skip this step. Add sauce to the pie, keeping in mind preferences for sauce amounts. I typically aim for an amount that just covers the pizza — you can see the crust in small gaps or if you disturb the sauce layer with the flat of a fork.
Add the cheese. I prefer shredded, but if you use flat slices start in the middle and work your way around and out. If say, you start with the provolone and find you have gaps, remember you can cover most of those when you put the mozzarella on next. Pepperoni goes on last (or whatever topping(s) you prefer). Pop it in the oven and let it cook for 18-20 minutes.
Now comes the hard part. You don’t want an undercooked pizza, which can look like it’s done when it’s not. I find that you have to let that pizza bubble and brown a little before it gets to that good spot. You’ll need practice before you can discover when the right time to take the pie out has arrived. You also don’t want that pie to start smoking either, so your challenge is to identify that gap between boiling hot but not quite done and whoa crispy broil bleh.
Take it out when you determine the moment of Doom has arrived and let it sit for two minutes. This allows the alchemical process to settle down and enter into our reality a little better. Then slide it onto your prepared surface and let it crystallize into yummy goodness for two more minutes. I use an ulu to slice it, but any big-bladed knife, cleaver or pizza roller blade will do.
You probably want to wait 5-8 minutes before eating, but I understand the hunger lust — I’ve burned the roof of my mouth a few times for that volcanic ecstasy sensation as the molten pizza satisfies every nerve center.
May your Pizza of Doom always satisfy!
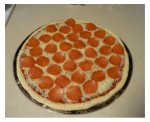
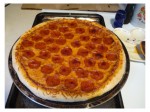
 I’ve mentioned the illustrious Pizza of Doom before. However, I don’t think I’ve actually ever posted any pictures of the magnificence that is summoning your own personal pizza to serve you good tasting satisfaction. Well, worry no more my illustrious 1d6 non-bot readers!
 I must practice my kung fu in a new way and in anew time zone cooridnate, solar systems are go and wooo!
 Oh, and bonus. The package has enough to cover the pizza. Those other cheese conglomerates, always short you cheese such that you can never quite cover the mega-mutha. May they roast in profits hell. You see, these little details matter! One must always have access to the proper goodies. Every small ingredient, physical or mental, affects the space time continuum of crafting.
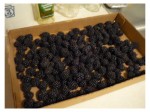
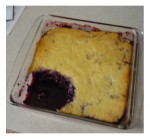
 But wait, there’s more! We also went picking triple crown sweet blackberries and brought some back for pancake toppings, general snacking, and cobbler. Alas, I could not translate my cobbler recipe so I had to crib from the internet. More work is to be done, yes I need to meditate on my cooking powers. But the topping was cooked well, and the blackberry sauce was delicious.